Crockpot White Turkey Chili with a Kick

It’s been way too long since my last post & I apologize for that. I’ve definitely been cooking, but have just been super busy with the home. I bought a house 3 days before Christmas, which is super exciting. The house had basically been gutted and redone. So we thought we were getting the perfect first home. Welp. Turns out the guy who redid the home really did a crap job. Thank goodness for my dad who used to build homes. Without him I don’t know what I would do. It’s been endless stress & endless talk about what needs to be done next. We keep looking at stuff and finding new things that were done incorrectly that need to be fixed. It’s been a real headache in a half.

My weekends are my favorite. My boyfriend comes home & I try to spend as much time with him when he’s home. Usually we bum around, i’ll cook dinner & he’ll build Lego. It’s his new obsession. I can’t complain because he joins me in the living room to build rather than staying in his little “man cave”.

A couple weekends ago I went over to a friends house to have GNO = Girls Night Out. One of my best friends just had a baby so we’re all obsessed. It was so nice to see them all. Since we’re adults now we all bring a dish and drink wine or beer or cocktails (or all 3 if you’re me). My one girlfriend brought this delicious white turkey chili. Like delicious. At first I was eating it thinking to myself, this is SO spicy, I don’t know how much I can handle. Next thing I know i’m practically licking my bowl clean. This chili was the bomb. Like so incredibly good I got the recipe and 2 days later was making it for my boyfriend & I. I love it so much I’m making it again a week later. It’s currently sitting in the fridge ready to go in the morning so we’ll have dinner tomorrow evening!

It’s got a kick to it, but I dulled it down a little so it’s not too spicy. You can definitely make it spicier if that’s your thing or make it more mild if spice isn’t up your alley. Trust me though, you’re going to love it. I highly recommend making some cornbread to go with it and crumbling a muffin over your bowl of chili. You won’t regret it. Avocado is delicious on top of it too if you have on on hand. And cheese, always add cheese. Mozzarella works marvelously.  ENJOY!


Crockpot White Turkey Chili with a Kick

Prep Time: 30 min Cook Time: 6-7 Hours

Ingredients:

  • 2 lbs Extra Lean Ground Turkey
  • 1 Yellow Onion, Finely Diced
  • 1 Green Pepper, Finely Diced
  • 2.5 teaspoons Minced Garlic or 5 Cloves Garlic, Chopped
  • 1 4oz Can Chopped Green Chilies
  • 1 teaspoon Chili Powder
  • 1 teaspoon Cayenne Pepper

    IMG_20160320_182637
    Crockpot White Turkey Chili with a Kick
  • 1 teaspoon Oregano
  • ½ teaspoon Cumin
  • 1 teaspoon Salt
  • ½ teaspoon black pepper
  • 2 Cans Cannellini Beans, Drained
  • 1 Can Butter Beans, Drained
  • 3 C Frozen Super Sweet White Corn
  • 6 C Low Sodium Chicken Broth
  • For Topping:
  • Crumbled Corn Bread
  • Mozzarella Cheese
  • Diced Avocado


Directions:

  1. Brown turkey in large pan on medium heat. While turkey is cooking, finely chop onion & green pepper. If you have a food processor, add both the onion & pepper to device and chop until fine.
  2. Once turkey is cooked thoroughly place into large (6 qt.) crockpot (if any fat remains drain before adding to crockpot).  Add onion & pepper mixture to the same frying pan you used to cook the turkey. Cook for 3-4 minutes until heated through.
  3. While the pepper & onion mixture is heating up, drain the liquid from the beans & add to the crockpot.
  4. Add garlic & green chilies to the pepper & onion mixture. Cook for an additional 3-4 minutes. Add spices to mixture and mix until evenly distributed. Remove from heat & add to crockpot.
  5. Add the corn to the crockpot along with the chicken broth. Start with 4 cups & add more until everything is covered. 6 cups seemed to be the magic number for me. If you like a less runny chili add less chicken broth.
  6. Cook on low heat for 6-7 hours. Top with crumbled corn bread, shredded mozzarella &/or diced avocado!

*Meal can be prepped ahead of time. Just wait to add chicken broth until you’re ready to turn the crockpot on. Add an extra half hour or so to the cook time if pulling from the refrigerator.*
Chicken, Broccoli & Rice Casserole

Casseroles have been my boyfriend and I’s friend these past 2 weeks. They’re really easy to make and the outcome is almost always a pan full of deliciousness.

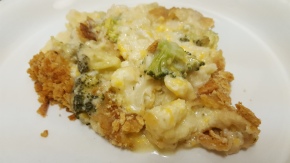
Last weekend we put soup Sunday’s on a hold & opted for a more comforting dish, like a casserole. At Thanksgiving I had this delicious broccoli casserole topped with Ritz crackers. It was heaven. I searched for a recipe similar to that but with chicken & rice. I wanted a chicken & rice casserole that reminded me of that amazing broccoli casserole with the salty Ritz crackers on top.

I found a recipe for a broccoli, rice & chicken casserole that I decided looked, one, amazing & two, possibly close to what I had at Thanksgiving. I decided to add cauliflower to the recipe because I love broccoli & cauliflower together & because why not?

It’s really quick to get together & cooks in around 45 minutes which makes it a great weeknight meal or any night really!


Chicken, Broccoli & Rice Casserole

Prep Time: 15 Minutes Cook Time:  40-45 Minutes

Ingredients:

  • 5 Chicken Tenderloins, Cubed
  • 2 C Fresh Broccoli, Chopped

    20151206_174212
    Chicken, Broccoli & Rice Casserole
  • 1 C Fresh Cauliflower, Chopped
  • 1 C White Rice
  • 2 C Cheddar Cheese
  • 1 C Cream of Broccoli
  • 2 1/2 C Low-Fat Milk
  • Salt/Pepper, Sprinkle of Both
  • 1 Sleeve Ritz Crackers, Smashed

Directions:

  • Preheat oven to 350 degrees.
  • While oven is preheating, cube chicken tenderloins & place in a medium sized mixing bowl.
  • Chop 2 cups of broccoli & 1 cup of cauliflower into bite sized pieces & add to bowl.
  • Add remaining ingredients to bowl with the exception of the crumbled ritz crackers. Mix until well combined.
  • Pour ingredients into a greased 9×13 baking pan & make sure everything is evenly distributed.
  • Top mixture with crumbled ritz crackers & place in the oven.
  • Cook at 375 degrees for 40 minutes or until rice & chicken are cooked.
  • Eat immediately & enjoy!

Broccoli, Egg & Cheese Breakfast Casserole

The first time I had a similar breakfast casserole to the one I am going to post, I swear, it was life changing. I love almost everything breakfast. I say almost everything because I have a deep hatred towards bacon. I’ve been called “terrorist” before because it’s true, who hates bacon? Well I do. Something about the texture and the appearance – I just cannot do it. The smell too. Makes me want to vom.

Back to the topic at hand. This breakfast casserole is legit. There are so many different things you can do with this recipe. You could throw any sort of meat in it that you want – sausage, ham… bacon or even veggies! We decided on broccoli for our casserole & it was so yummy. Just swap out the broccoli in the recipe for whatever you’d like – spinach, tomatoes, mushrooms, onions, meat – you name it, i’m sure it would be just as delicious!

Also, this recipe is super easy to make. If you have a half hour of time you’re pretty much set. Prep is pretty quick & it only takes about 20-25 minutes to bake in the oven. Easy-peasy! You could even prepare it the night before if you’re pressed for time & bake it the next day! It’s so great. Enjoy!


Broccoli, Egg & Cheese Breakfast Casserole

Prep Time:  10 Minutes Bake Time: 20-25 Minutes

Ingredients:

  • 1 Can Crescent Rolls

    IMG_20151213_104402
    Broccoli, Egg & Cheese Casserole
  • 4 Eggs
  • 1 Cup Mild Cheddar
  • 1 Cup Monterey Jack
  • ¾ Cup Low-Fat Milk
  • ½ TBSP Butter, Cubed
  • 1 Medium Head of Broccoli, Cut into Bite Size Pieces
  • Salt/Pepper

Directions:

  • Preheat oven to 375 degrees. Spray a 9×13 baking dish with cooking spray & line with crescent rolls. Gently press the crescent roll pieces together so they cover the bottom evenly.
  • While oven is preheating steam the broccoli so it turns bright green. You can do this over the oven or in the microwave, whatever is easiest for you! Once broccoli is steamed set aside & allow any moisture to drain from the broccoli.
  • In a medium bowl add eggs & milk & beat until combined. Set aside.
  • Layer the broccoli on top of the crescent roll crust as evenly as possible. Next sprinkle the cheese over the broccoli. Pour the egg mixture over the cheese & broccoli. Allow to spread out & sprinkle with salt & pepper.
  • Place into the preheated oven & bake for 20-25 minutes or until mixture begins to turn golden & eggs are cooked.
  • Allow to cool & set slightly before serving & enjoy!


Crock-Pot Cream of Chicken & Vegetables

Crock-pots are a huge love of mine. I mean, how can you not love your crock-pot!? It works magic while you’re at work or bumming around. It’s one of the best darn inventions ever. This weekend was a lazy one, but needed. Time to unwind and relax, be it all weekend, or for a few hours, is very necessary. It’s time to find yourself again in this busy chaotic world.

Saturday the boy & I decided to sleep-in, hang out & play video games all day. What better time to whip out the crock-pot. We wanted something tasty, but not SUPER terrible for us. Both of us are “trying” to watch what we eat & by trying I mean not really, but we like the idea of it.

We found this recipe on pinterest from Skinny Mom called, Skinny Slow Cooker Creamy Chicken. The fact that it had “Skinny” in the recipe title sold us, although I don’t know how “skinny” it is for you, but hey, why not! We both were SO happy that we made this. It was legit so dang delicious. I had 2 servings which instantly makes it not skinny anymore, but seriously, it was that good! We added a bunch of vegetables into the recipe & I am so happy we did. It gave it a good crunch & change in texture. Loved it.

So if you’re looking for an easy recipe, something creamy, and oh so delicious, this is the recipe for you! Enjoy!


Crock-Pot Cream of Chicken & Vegetables

Prep Time:  15 Min          Cook Time:  4 Hours & 15 Min

Servings: Approximately 6

Ingredients:

  • 1.5 LBS Boneless Chicken Breasts

    Crock-Pot Cream of Chicken & Vegetables
    Crock-Pot Cream of Chicken & Vegetables
  • 1 Packet of Garlic & Herb Dry Dressing Mix, .75 OZ
  • 1 C Water
  • Salt & Pepper, to Taste
  • ½ Sweet Onion
  • 1 ¼ C Fresh Broccoli, Cut into Bite Sized Pieces
  • 1 ¼ C Fresh Cauliflower, Cut into Bite Sized Pieces
  • 1 C Shredded Carrots
  • 1 Can (10.5 OZ) Campbell’s Healthy Request Condensed Cream of Chicken Soup
  • 8 Ounces Reduced Fat Cream Cheese, Cubed

Directions:

  1. Trim any fat off of chicken breasts. Sprinkle a little salt/pepper onto both sides of the chicken breasts.
  2. Place into crock-pot.
  3. Combine 1 cup water & garlic & herb dressing mix into a small bowl until dissolved. Pour over chicken in crock-pot.
  4. Dice ½ sweet onion & place in crock-pot with chicken.
  5. Turn crock-pot on high. Allow chicken to cook for approximately 3-4 hours until chicken is tender & shreds easily.
  6. While chicken is cooking, begin prepping broccoli, cauliflower & carrots. Set in fridge until chicken is done.
  7. Once chicken easily shreds, add the cubed cream cheese & condensed cream of chicken soup to crock-pot stirring until combined.
  8. Add cut up vegetables & mix. Allow to cook for an additional 30-40 minutes on high until heated through. ENJOY!
  9. Serve atop a rice mixture or simply enjoy by itself!

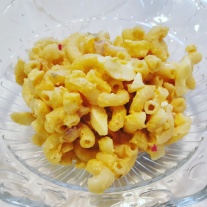
Not So Amish, Amish Macaroni Salad

So my boyfriend & I usually try and prep a couple meals/sides on Sunday’s before he leaves for the week to head up to work. He’s been telling me about how much he really enjoys picking up Amish Macaroni Salad on his lunch break. Naturally, I decided to try making Amish Macaroni Salad to send with him to help him save a little money. Homemade is always better anyways!

Now I have never actually had legit Amish Macaroni Salad so I was excited to try making it. I didn’t really have a taste to go off of, but I did find a recipe with eggs & cheese in it, two of my favorites. We made it one week & it was good, but I wanted to try changing it up slightly the next week. It’s delicious. Probably not as “Amish”, but it’s a darn good macaroni salad if I do say so myself.

Of course it’s fall & I’m posting picnic items, but that’s just how I roll. I’d make pumpkin pie in June if I had help eating it. Heck, I would drink pumpkin beer year round if someone would just keep the shelves stocked. Who ever said there isn’t a market for fall flavors year round is surely mistaken.

So a pasta salad in September, almost October it is! I hope you all enjoy!


Not So Amish, Amish Macaroni Salad

Prep Time:  30 Minutes                 Total Cook Time: 1 Hour & 30 Minutes

Ingredients:

  • 1 Box Macaroni (1 lb)
  • ¼ C Red Onion, Diced
  • 2 Tbsp Dill Pickle RelishNot So Amish, Amish Macaroni Salad
  • 1 15oz Jar of Light Miracle Whip Dressing
  • 3 Tbsp Yellow Mustard
  • ¼ C Sugar
  • 3 tsp White Vinegar
  • ¼ tsp Salt
  • 1/8 tsp Black Pepper
  • ¾ tsp Paprika
  • 4 Small Hard Boiled Eggs, Chopped – or 3 Large Hard Boiled Eggs
  • 1 C Colby Jack Cheese, Cubed

Directions:

Cook macaroni according to the directions on the box.

Begin dicing onion, hard boiled eggs & colby jack cheese. Set aside.

Combine dill pickle relish, light miracle whip dressing, yellow mustard, sugar, white vinegar, salt, black pepper & paprika in a large bowl. Combine using a whisk. Once thoroughly combine set aside.

Once noodles are cooked & slightly cooled, combine with dressing, diced onions, chopped hard boiled eggs & cubed cheese.

Cover & chill for approximately 1 hour. Chilling overnight is best if time allows it! Enjoy!

Crispy Capers, Cauliflower & Spinach Pasta

I just got back last weekend from an epic 2 week road trip across the US with my fantastic copilot boyfriend. Our main goal was to return to Utah for a friends wedding, but of course we had to make some fun stops along the way. We went South before heading North, and then back East:  Virgina, Tennessee, Oklahoma, Arizona, Nevada, UTAH, Colorado, Iowa, Illinois & Pennsylvania (home). It was so fun, but man did I miss cooking. There are only so many gas station sandwiches you can eat before you begin to loose your mind. Road food is fun for a day & then it’s just downright bad. So needless to say, once I was unpacked, laundry was washed & I was starting to get back to my routine, I started scouting out some tasty recipes to try out.

I had around 4,000 frequent flyer miles, sounds like a lot, but of course not nearly enough for a free flight. So what does the airline do with those miles you ask? They offer magazine subscriptions at no cost, simply use my miles for the ones I want. Cool right? Not really, but hey, it’s better than nothing right?!

One of the magazines I subscribed to was Everyday with Rachel Ray. There are a lot of delicious sounding recipes in the magazine, so I’ll take it as a win in the selection book. I have cooked 2 of the recipes in the magazine, adding my little spin on them, of course. That’s where all the fun is, and eating all the food, but that’s a given. In the magazine the recipe is called Cauliflower & Caper Pasta. It’s a really delicious dish. I have been wanting to cook something with capers for a while now. I always loved anything with capers & lemon. The tartness of both just goes so well together with chicken, pasta a lot of things really. So once I saw “caper” in the title, I knew I was going to try it out.

The hardest thing about this recipe is crisping the capers. Now I have never fried anything a day in my life. I’m scared of hot oil, just like I’m scared of the broiler. Dummy me did not have a cover for the frying pan to prevent the oil from going EVERYWHERE once I added the capers to the pan. Learning curve. Needless to say I walked away with only minor oil burns & by minor I mean, just redness for a day and an initial sting. They always say you learn from your mistakes, & yes, yes I did learn from my mistake. So please, if you’re going to make this dish, be EXTRA careful when crisping the capers & the cauliflower. I don’t want anyone else burning their precious hands.


Crispy Capers, Cauliflower & Spinach Pasta

Serves: 5              Total Time: 45 Min.

Crispy Capers, Cauliflower & Spinach Pasta

Ingredients:

  • 5 TBSP Olive Oil
  • 4 OZ Drained Capers (Patted Dry!)
  • 1 Head of Cauliflower, Cut into Bite Sized Pieces (Washed & Patted Dry!)
  • 1 C Fresh Spinach Leaves
  • 1 Box of Spaghetti, I use Barilla Protein Plus, but any Spaghetti will work just fine!
  • 1/2 C Warm Water
  • 1 C White w/ Lemon Flavor Cooking Wine
  • 4 Cloves Garlic, Minced
  • 1 TBSP Fresh Thyme Leaves
  • 1/4 C Grated Parmesan

Directions:

  • Cook spaghetti according to package directions.
  • While pasta is cooking, cut cauliflower into bite size pieces, wash & pat dry. Drain capers & pat dry.
  • Begin heating up a medium-large frying pan with olive oil on medium heat. Add capers to hot frying pan, BE CAREFUL. If you have a frying pan screen now is the time to use it!
  • Work capers around in pan until crispy, approximately 8 minutes. Scoop out with a slotted spoon & place into a bowl on the side.
  • Begin adding cauliflower florets to frying pan. Work around pan until browned, approximately 8-10 minutes.
  • Add garlic, water, white cooking wine w/ lemon flavoring & fresh time. Combine together & add capers & spinach. Once heated through & pasta is cooked & drained, add to large bowl with pasta being sure to cover all of the noodles. Top with parmesan cheese mixing well. Serve immediately & ENJOY!

Crock-Pot Pineapple Chicken

Two posts within 24 hours – you lucky ducks!

This past Sunday was a relaxing day. I spent it with my favorite boy cleaning his apartment, cooking lunch, dinner & even dessert! We went thrifting on Saturday and I scored this cute little cookbook called “101 Things To Do With A Slow Cooker” by Janet Eyring & Stephanie Ashcraft for $1.00. Schwing! The recipes are all super simple which I like because it leaves a lot of room for adding my own little spin on them. Plus, who doesn’t love a delicious crock-pot recipe?! Crazy people, that’s who.

The recipe i’m going to share with you all is called Pineapple Chicken – simple enough. It’s delicious with some oriental vegetables & brown rice. I opted for a frozen vegetable mix with water chestnuts, snap peas, green beans, carrots, red peppers & onions. The pineapple chicken alone would probably taste delicious on some Hawaiian bread, or potato bread even – something a little sweeter!


Crock-Pot Pineapple Chicken

Serves: 4-6         Prep Time: 10 Min          Cook Time: 6-7 Hours Low

Ingredients:

  • 1-1.5 LB Boneless Skinless Chicken Breasts (I used 1 package of chicken breasts, which had 3 large chicken breasts)
  • 1/4 TSP Mrs. Dash Garlic & Herb
  • 1/8 TSP Mrs. Dash Extra Spicy
  • 1/4 TSP Black Pepper
  • 1 Can Pineapple Tidbits (20 OZ), Juice Included
  • 2 TBSP Dijon Mustard
  • 3-4 TBSP Low Sodium Soy Sauce
  • 1/4 TSP Minced Garlic

Directions:

  1. Grease a 3.5 to 5-quart slow cooker with cooking spray or butter.
  2. Combine spices & sprinkle over chicken breasts. Place chicken into crock-pot, low setting turned on.
  3. In a separate bowl mix the pineapple tidbits, juice from the tidbits, dijon mustard, low sodium soy sauce & garlic. Pour over chicken & cover.
  4. Cook on low for 6-7 hours or until chicken is easy to shred.

**If you’re cooking with frozen vegetables I added them into the crock-pot for 10 minutes once the chicken was done. Make sure to mix them well so that they all get a little of the liquid on them!

Smoked Paprika Honey Glazed Chicken

It’s been ages since my last post. AGES. I’ve been meaning to post, but my life has been a bit hectic these past couple of weeks. Mostly a good kind of hectic, but this past week a friend of mine passed away suddenly in a long boarding accident. It makes you think about life & how precious & fragile it really is. Just like that it can be taken away from you. Cherish every single moment you have with the ones you love. Tell them you love them. Don’t hold anything back. Life is way too short to hold anything back. Do what you love & what makes you happy, because you just never know.. Don’t waste any time being unhappy.

I’m trying to focus on all the good he gave this world, but am having trouble accepting how unfair life really can be. Good people don’t deserve bad things. Good people don’t deserve to die. I mean, no one really deserves to die, but good people definitely don’t deserve to die. Really all that I can do is remember the good times we shared with our beautiful Park City family.

We all moved out there for a little taste of our own freedom, on our own, out of our comfort zones. We all found it while finding each other. Some of us stayed, some of us left, but we’ll all always share that amazing bond we created those years we spent together, laughing, crying, drinking, skiing & riding. Mountain towns do something to the people that live there. They bring out the best & the worst in you. They make you find yourself & who you are. There will always be a special place in my heart for the mountains & the people I met while out there.

I’ve decided to focus on doing what I love. I spent enough time in my life being unhappy, and sure, it’s dumb of me to think I won’t ever be unhappy again, but I’m hopeful for endless amounts of happiness in my future. There are so many good people in my life right now, some close in distance, some far. I trust them & I love them.

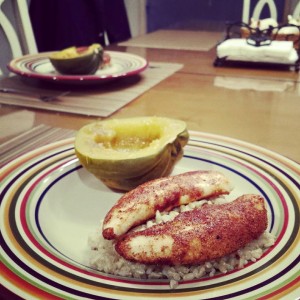
So here we are. Finally, a new recipe. I’ve eaten this three times in the past week that’s how much I love it. The original recipe came from Nutmegnany. My roommate actually stumbled upon this recipe and made it for dinner one night. I had a few bites & knew that I was going to make this for my boyfriend the next time I got to see him. Now the original recipe is quite spicy. I do not enjoy a lot of heat in my food. I start to focus on how much my mouth burns rather than what the food tastes like. My adapted version of the recipe omits the crushed red pepper that Nutmegnanny calls for in her recipe for Honey Spiced Glazed Chicken. If you like heat, add some crushed red pepper to your spice mix! It’s delicious with or without it, I personally just prefer not to sweat when I’m eating my dinner. 🙂

This dish goes great with a sprouted rice & quinoa blend. I found this delicious blend by truRoots at BJ’s & have fallen in love with it. It’s a great blend of grains packed with all sorts of good stuff.  A brown rice or white rice would work just as good though! We enjoyed it with a side of acorn squash since I had one laying around that needed to be used. Any vegetable would work as a side to make it a well rounded dish.


Smoked Paprika Honey Glazed Chicken

Serves 3-4           Prep Time: 10 Min          Cook Time: 15-20 Min

Ingredients:

  • 1 Package Chicken Tenderloins (1-1.5 LB)

    Smoked Paprika Honey Glazed Chicken
    Smoked Paprika Honey Glazed Chicken
  • 2 TSP Smoked Paprika or Regular Paprika
  • 2 TSP Garlic Powder
  • 1 TSP Salt
  • 1 TSP Black Pepper
  • 1 TSP Chili Powder
  • 1 TSP Onion Powder
  • OPTIONAL: 1/2 TSP Crushed Red Pepper Flakes
  • 1/2 C Honey
  • 2 TBSP Apple Cider Vinegar

Directions:

  1. Combine spices in a small bowl (paprika, garlic powder, salt, black pepper, chili powder, onion powder & crushed red pepper if using)
  2. Set oven to broil on low & line a sheet pan with tin foil (easier cleanup).
  3. Season each side of each chicken tenderloin with spice mixture & place on sheet pan.
  4. Place sheet pan with chicken in over for approximately 5-7 minutes for each side (5-7 minutes on one side, flip & 5-7 minutes on the other side).
  5. While chicken is cooking combine 1/2 cup of honey & 2 TBSP of apple cider vinegar, mixing well.
  6. After chicken is done cooking pour the honey mixture over the cooked chicken making sure to cover all of the chicken. Place the sheet pan back in the oven and allow the glaze to thicken for about 3 minutes.
  7. Remove chicken from oven and serve immediately.  ENJOY!

Yogurt Baked Chicken with Garlic & Thyme

Last night I cooked what tasted like the most incredible chicken I have one ever made & two have ever tasted in my life. I found this Garlic-Yogurt Baked Chicken recipe the other day on http://www.diethood.com and thought I would give it a whirl.

I haven’t cooked in a little time so I wanted to make something delicious for dinner on Sunday. Life throws you twists & turns and sometimes your hobbies have take a backseat to life. I’m lucky enough to have some amazing twists & turns going on in my life & I couldn’t be happier about everything. This chicken just made me that much happier. True story. SO GOOD.

I like to always have a positive outlook on life. I mean really though, who has time to be negative. We’re given this one life so why not make the best of it? I try to always find a positive spin for everything, even things that don’t seem so positive. So I look at it as I haven’t had the opportunity to cook in a week or so, which is sad, but because of that week long wait I was able to find my new favorite chicken recipe to drool over for a long time.

If you get an opportunity to make this recipe, I really hope you enjoy it as much as I did!


Yogurt Baked Chicken with Garlic & Thyme

Serves 4-5

Yogurt Baked Chicken w/ Garlic & Thyme

Ingredients:

  • 4 Large Chicken Breasts
  • Salt/Pepper
  • 8 Garlic Cloves, Minced
  • 10 OZ Plain Greek Yogurt
  • 1 TBSP Fresh Thyme Leaves
  • Plain Bread Crumbs 1-2 Cups
  • 1 Lemon
  • 1/2 Red Onion

Directions:

  • Season each chicken breast with salt/pepper, front & back. Place in a baking pan & set aside.
  • Combine yogurt, garlic & thyme in a mixing bowl until well combined.
  • Smear the yogurt mixture over each chicken breast, front & back, making sure that every piece of chicken is covered.
  • Cover the baking pan with yogurt covered chicken with plastic wrap. Place the pan into the refrigerator for 4 hours.
  • After chicken is done marinating in the yogurt mixture remove from the fridge.
  • Preheat oven to 375 degrees Fahrenheit.
  • Grab a clean baking dish to place the chicken in. Remove any extra yogurt mixture from the chicken by gently shaking each chicken breast. Clumps should fall off. You want the chicken to remain covered but just lightly coated. Discard any leftover yogurt mixture.
  • Sprinkle bread crumbs lightly over both sides of chicken.
  • Slice up lemon & place 1 to 2 slices onto each chicken breast.
  • Slice up the 1/2 onion into quarters & position around chicken.
  • Bake for 45-50 minutes until chicken is done. Serve immediately.
  • ENJOY!

Spinach Artichoke Pasta with Roasted Garlic Chicken Sausage

I’ve been cooking a lot, which is amazing. Means my soul is definitely happy. Lots of good things happening and lots of great things to look forward to. Life is good to keep it simple, but really, when isn’t life good?

Monday night I came home from work at about 4:15pm our usual return, and the roommate did not have dinner prepared or even thought out. Now we eat dinner extremely early according to some. My dad has his weekly ritual:

  • Leave for work at 7:30am
  • Head home for lunch at 12:00pm
  • Return to work around 1:00pm
  • Head home around 4:00pm
  • Drink a beer or two
  • Eat dinner around 5:15pm

This is every Monday-Friday without fail. Occasionally we’ll stay later at work if we are in the middle of something, or we’ll go in earlier/later. It really all depends, but for the most part this is the schedule and he’s sticking to it.

So my point, it takes some time to prepare dinner & the fact that nothing was done at 4:15pm worried me. I took the bull by the horns and decided I would cook dinner, really had to yank my chain to get me cooking.

I looked in the fridge and saw a lot of spinach. The pantry had a can of artichoke hearts & I remembered that we had purchased some chicken sausage the other week that needed to be used. There’s always pasta in the house & everyone in family LOVES spinach artichoke dip. So I stumbled upon a recipe form a blog called A Life of Flavor to use as an outline and see what I could do with it.

To be honest, I am still dreaming about this dinner 4 days later. If you’re a lover of cheese, spinach, artichokes & pasta you will absolutely love this dish. It’s really easy  & quick to whip up. You will not be disappointed.


Spinach Artichoke Pasta w/ Roasted Garlic Chicken Sausage

Ingredients:

  • 12 OZ Box of Pasta, your choice

    Spinach Artichoke Pasta w/ Roasted Garlic Sausage
    Spinach Artichoke Pasta w/ Roasted Garlic Sausage
  • 1 TSP Butter
  • 1 TBSP Olive Oil
  • 2 Garlic Cloves, Minced
  • 8 OZ Reduced Fat Cream Cheese
  • 1/2 C Milk
  • 1/2 Cup Plain Greek Yogurt
  • 1/2 Lemon, Juiced
  • 1/2 TSP Salt
  • 1/4 TSP Crushed Red Pepper Flakes
  • 1/2 Yellow Onion, Diced
  • 14 OZ Can Artichoke Hearts, Drained & Chopped
  • 6-7 Handfuls of Fresh Baby Spinach
  • 4 Links Roasted Garlic Chicken Sausage, Sliced into Bite Size Pieces
  • 1/2 C Shredded Parmesan Cheese

Directions:

Cook the box of pasta according to package directions.

In a large frying pan, heat olive oil over medium heat. Add diced onions & sliced chicken sausage. The sausage most likely will be fully cooked. Heat until outsides are browned and onions are translucent. Set aside.

In a medium saucepan over medium heat, melt butter & add the minced garlic.  Add cream cheese and stir until creamy & smooth.  Stir in the milk and add the Greek yogurt, lemon juice, salt & crushed red pepper flakes. Once combined and heated through, add the chopped artichoke hearts, baby spinach & shredded parmesan cheese.

Drain the pasta & add the artichoke/spinach mix along with the cooked chicken sausage and onions.  Top with additional parmesan cheese if desired & ENJOY!